The DirectAdmin interface will assist you in configuring external mail services like Google Suite, Microsoft 365 and Zoho Mail. It has templates for these three services.
To change the local MX records to Google/Microsoft/Zoho:
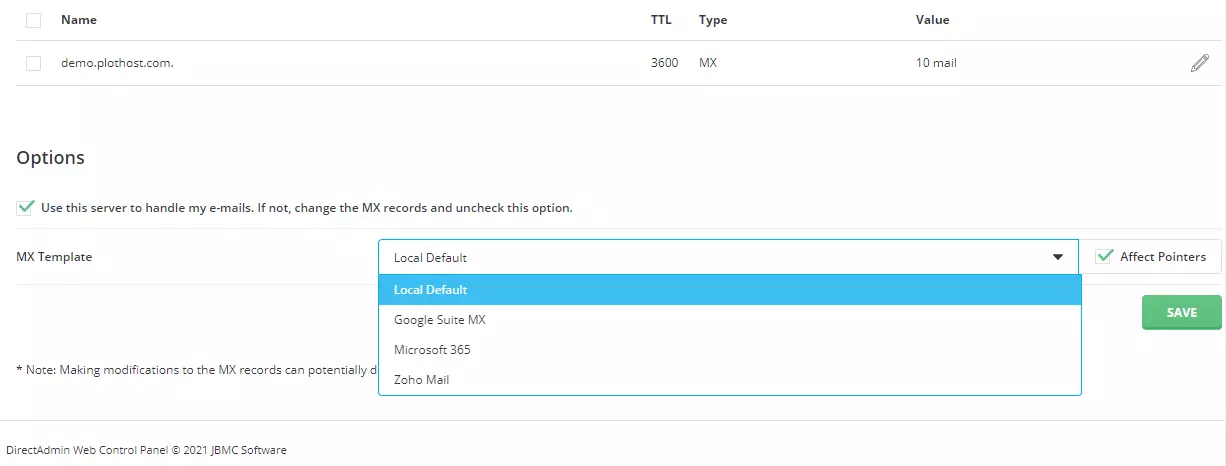
1. Connect to your DirectAdmin installation
2. Look for E-mail Manager >> MX Records
3. Choose the pre-defined MX template – Google Suite, Microsoft 365 or Zoho Mail – and click the SAVE button. The new MX settings are not applied and you can use the external mail service.
For example, for the Google Suite, the MX records will look like:
Name	TTL	Type	Value
demo.plothost.com.	3600	MX	1 ASPMX.L.GOOGLE.COM.
demo.plothost.com.	3600	MX	10 ALT3.ASPMX.L.GOOGLE.COM.
demo.plothost.com.	3600	MX	10 ALT4.ASPMX.L.GOOGLE.COM.
demo.plothost.com.	3600	MX	5 ALT1.ASPMX.L.GOOGLE.COM.
demo.plothost.com.	3600	MX	5 ALT2.ASPMX.L.GOOGLE.COM.
The records for Microsoft 365 will be:
demo.plothost.com. MX 0 demo-plothost-com.mail.protection.outlook.com.Zoho email records will be:
demo.plothost.com.   MX   10   mx.zoho.eu.
demo.plothost.com.   MX   20   mx2.zoho.eu.
demo.plothost.com.   MX	  50   mx3.zoho.eu.
Of course you are able to add custom MX records. Just click the ADD RECORD button. Enter the name of the record, TTL and Value.
The tutorial for this article:
Very helpful, thank you!