In this knowledge base article we will show how to compress/decompress files with the cPanel File Manager.
Steps to compress files via cPanel File Manager
- Login to your cPanel account
- Go to File Manager from the FILES Section
- Navigate to the directory where you have the files you want to archive.
- Select the files: hold the CTRL key down and click the files. If you want to archive all the files you can click the Select All button from the File Manager top menu.
- Click the Compress button from the File Manager top menu.
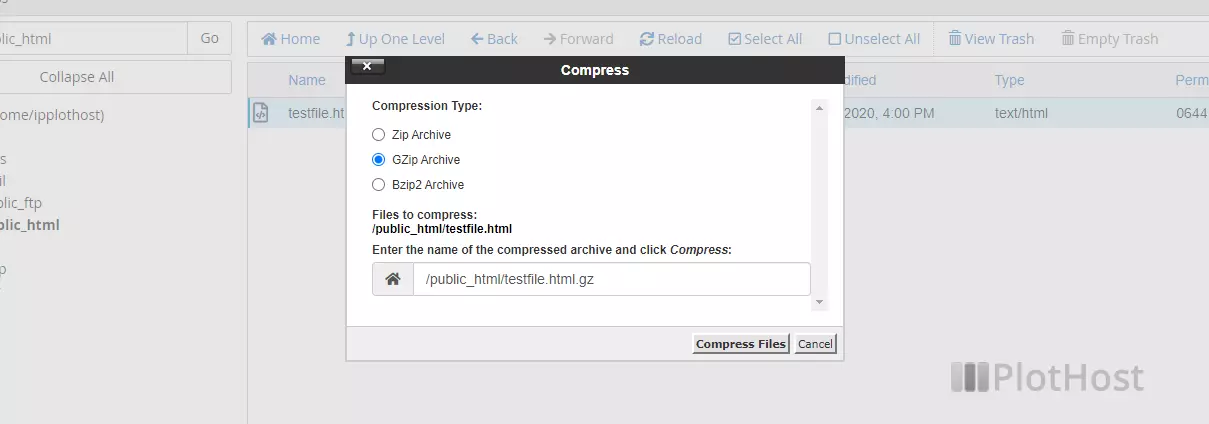
- On the Compress Window choose the Compress Type (Zip/Tar/GZiped Tar or Bzip2ed Tar) you want to be used. Also here choose the desired archive name.
- Click the Compress File(s) button. The archive will be created and a message will let you know this.
Steps to decompress(extract) files via cPanel File Manager
- Login to your cPanel account
- Go to File Manager from the FILES Section
- Navigate to the directory where you have the archive that you want to decompress.
- Select the archive by clicking on it.
- Click the Extract button from the File Manager top menu.
- On the Extract Window, you can choose the path where the files will be extracted. By default, the path is the current directory.
- Click the Extract File(s) button. The archive will be decompressed.
The video tutorial on how to compress and decompress (from 01:42):
You can also compress files and decompress archives on your computer. Use the File Manager or the FileZilla FTP client to download/upload files to your web hosting account.